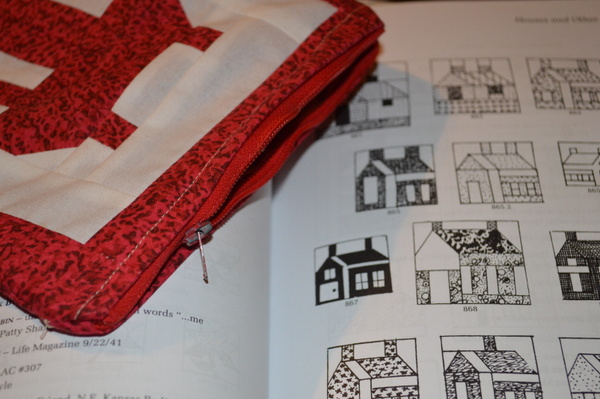
Showing posts with label zippers. Show all posts

Thursday, November 30, 2017

Old Fashioned Shoes and Burlap


This shoe print has been in my stash for a long time, although I looked up the blog post where I first mentioned them and it's not nearly as long as I thought it had been. It's a cute print but the fabric itself is almost like burlap and definitely not something that belongs in even the scrappiest quilt. 

I thought it would make a nice zipper pouch and set it aside until I conquered my zipper phobia. And then I forgot about it. It surfaced again when I was stash diving last year and I added it to the pile of fabric that's supposed to become bags. 

Last night,  I finally got around to sewing it up and in my tradition of grabbing whatever is suitable and closest to me I found the absolute perfect lining. I probably did have that when I first bought the scrap bag with the outer fabric in it, but it wasn't in a place where the two of them would have come together.

Sometimes waiting works out well.  


This post is linked to Crazy Mom Quilts and Bag It.

Tuesday, November 07, 2017

Is She Picking Apples?

Same fabric, different bag. 


The back of the bag is a solid blue fabric that comes close to matching her gown. This image was partially cut off by the selvedge, but it still had her face and arms and the fruit. That's the only part I really need.

Miraculously, a zipper from my thrifted stash was exactly the right length for the pieces I'd cut -- and it was on top of all of the others. I regularly shorten zippers to make them work, but if one already happens to be the right size, I'll happily take advantage of that.

I really like how  this little bag turned out, and it's given me an idea for another possibility. The great thing about having a big hunk of fabric is that I don't have to worry as much about the opportunity cost that comes with my design choices. There's enough to try again and again with different techniques.

Thursday, October 26, 2017

A Five Hundred and Two Piece Project Bag

Months ago, I was standing in line at the grocery store and caught a glimpse of a yellow and white quilt on a magazine cover. It was a home decor magazine and the quilt was barely visible, but the idea of yellow and white stuck with me. I thought I'd do something with that color combination once Bag It! rolled around.


By the time I was ready to get started, I had no idea what pattern that original quilt used. I knew I wanted a lot of blocks so that it would look like a quilt.  Nine patches and snowballs are easy to make, and I'd already worked out their measurements for this project, so I went with that. Each block finishes at 1 1/2".

The front and back of the bag are identical, with thirty-five blocks on each. My piecing and quilting are a disaster, but I really like the idea. And it's definitely good enough to haul a knitting project around in.

This project used up every last scrap of solid cheddar from my bow ties quilt. So in addition to being cute and sturdy, it's a happy reminder of one of my favorite scrap quilts.


If I had more solid cheddar, I'd think about making a strap and turning it into a purse....but I don't so I'll think about making something similar, but a little larger and with inner pockets. 

Want to make one of your own? I didn't have the time to photograph and write up the steps for a tutorial, but it's easy enough to figure out. Use the measurements and piecing instructions from my Full Blown Quilt Lust mini quilt to make thirty-six nine patch blocks and thirty-four snowball blocks. (The color placement in this one is reversed, but it'll look nice either way.) Each side of the bag is seven blocks by five blocks, with a two inch border. I quilted the front and back to a piece of scrap batting, then assembled them into a lined pouch. Easy -- as long as you don't mind piecing those seventy-five little blocks!

This post is linked to Bag It! and Crazy Mom Quilts

Thursday, October 19, 2017

I'm Not a Fan of Fussy Cutting

Now that I've gotten more comfortable installing zippers, it's the fabric giving me fits. The piece of yardage I used for this bag was on the freebie table at our quilting group, deemed "not suitable for charity quilts." (On the same day that I picked up the fabric I used in my last bag.)  It was pretty, so it came home with me and I decided to make a project bag or two while I try to figure out why classical artwork isn't suitable for charity quilts. 


I wanted a bag that showcased one image without having chopped off bits of the others along the edges. That was easier said than done and involved too much fabric waste to make me happy. I'm not a fan of fussy cutting when it involves taking a hunk of the center of the fabric, but to get the ladies I wanted, I had no choice...


What would you do with this hunk of fabric? I could see using it as a quilt back, or maybe someone using it to make a skirt. Or apron? Whatever it is, it's going to require either a big stretch of uncut fabric or some seriously wasteful fussy cutting.


The other side of the bag has a different image. In my head, I wanted it to be bigger, but that wouldn't have looked right. Now I'm thinking of two different ways I could have worked with this fabric...happily I have two yards of the stuff so, even if I'm being wasteful, it'll go a long ways.

This post is linked to Bag It! and Crazy Mom Quilts

Tuesday, September 26, 2017

The Most Suitable "Unsuitable" Fabric

At the quilting group a couple of weeks ago, there was a table full of fabric up for grabs. Someone had deemed it unsuitable for our donation quilts and I guess if I really think about it I can understand why this print was on the table. 

It might not be a good choice for the quilts we're putting together, but it made a pretty fantastic project bag!  


I was always one of those stitchers who carries around her project in whatever's handy. That was a clear Zip Loc on a good day and a slightly torn plastic grocery sack on the rest. None of the lectures about how "Your work is worth better than that" or "Something will get thrown away by accident" made any difference.

These project bags, especially the ones with the clear fronts, are curing me of that. They're nice and pretty and if I actually use them on a consistent basis I'll need to make more.


How about you? Do you carry your projects around in something nice -- or whatever's handy?

This post is linked to Crazy Mom Quilts

Saturday, May 20, 2017

Putting New Skills to Practical Use

Last Christmas, we bought Teenage Son an accessory kit to use with his GoPro. (Ours came from Costco, but I found the same thing on Amazon.)  

The set comes with a drawstring nylon bag. I wanted him to have something more durable and easier to get the parts in and out of. An ill-fitting pair of jeans, one of those heavy-duty zippers I thought I'd never use, and fifteen minutes later... 


WHY did I resist zippers for so long? The other options can be fun, but it sure makes life easier if you can sew one when the occasion calls for it.


Makes me wonder what skill I'll be excited about a few years down the road. Buttonholes?

Thursday, May 11, 2017

For the Washi Tape and Post It Notes

I wanted a little bag that would keep my sticky notes and a couple of rolls of washi tape contained. This should do the trick --


My finishing skills are getting better with each bag. There's usually something I tell myself I'll do better on the next one. This time it's the black zipper stop. That should have probably been white. And I should have left the zipper a half an inch longer.


An invisible zipper probably isn't the traditional choice, but I had a white one in my stash and figured it'd be better to use it up on this little experiment. It zips and it'll hold stuff in.

This post is linked to Crazy Mom Quilts

Sunday, May 07, 2017

I Hoard Zippers

Zippers at estate sales can be almost insanely cheap. Zippers at Walmart or the craft store are expensive.  And for some reason I can't quite understand, the zippers at the actual quilt shop fall in between those two extremes....

Estate Sale Zippers

The prices you can see in that picture aren't what I paid. I watch for the sales where a whole box is going for a couple of bucks. If I had to buy a new zipper for every cute little project bag, I wouldn't be making more than one or two of them. I also wouldn't be trying new techniques that might not turn out well.

If I dig through my stash, I can probably find a zipper that's close enough to the color and style I need. The teapot project bag I made last week has a green zipper that's the same shade as some of the teapots. I figure I'm more likely to use the blue zippers in future projects than that particular shade of green.  Once I find the right color, it's easy enough to shorten the zipper to the size I need.  

Weekly Stash Report

Fabric used this week: 0 yards
Fabric used year to date: 2 yards
Fabric added this week:  0 yards
Fabric added year  to date: 5 yards
Net added for 2017: 3 yards

Yarn used this Week:  300  yards
Yarn used year to Date: 3550 yards
Yarn added this Week: 0 yards
Yarn added Year to Date: 9350 yards
Net added for 2017: 5800 yards

This post is linked to Patchwork Times.

Thursday, May 04, 2017

Tea Pot Project Bag

I  can't stand the taste or aroma of actual tea, but that doesn't mean that I can't enjoy the cute little teapots on this novelty print. 


It would have been a shame to cut it into little pieces and lose all of the details, so I made a quickie project bag that's just the right size for a pair of socks.

Now that I've used most of the fabric for something useful, I won't feel at all guilty about incorporating the rest into a scrap quilt. I think some of the pots would show up in a sixteen-patch or flying geese unit.


Thursday, March 30, 2017

Ribbon and Vinyl

I made a little thing. And I figured out how to photograph it without either the overhead light or my camera flash reflecting off of the vinyl. I just may be happier about that little achievement than I am about the bag itself!


When the Ribbon and Vinyl Zipper Pouches Tutorial from SewCanShe showed up in my Pinterest feed  I immediately thought of all of that ribbon that Ila sent. There's more than enough of the leopard print ribbon to experiment with and I've got plenty of vinyl and zippers. 

Despite the fact that I managed to attach the little tab/handle wrong twice, the pattern isn't difficult at all. Vinyl and ribbon are a slippery combination, so you'll want either the clips that the tutorial suggests or tape like I used to keep everything lined up until it goes under the needle. And you'll want to double check the instructions for the handle. 

Tuesday, January 17, 2017

The Wrong Schoolhouse Block


I've had this block pinned up over my sewing machine since I made it in August. I was just playing with fabric at the time and didn't really plan to make the entire quilt. So I'd been thinking about finishing it into a little zipper bag, then telling myself I'd  regret that if I decided to go ahead with the full quilt...

I can always make another block if I change my mind, but I don't expect that to happen. It turns out that the block I've been wanting to make wasn't incredibly easy. What I made was the wrong block...

To make the house quilt I want, I'll have to play with templates. But I can do that. Someday. 


Thursday, January 12, 2017

Another Vinyl Zipper Bag

Inspired by lots of pretty examples on Pinterest, my search for the perfect project bag continues...

Zippered Vinyl Project Bag

This one should have been easier than my first vinyl project bag, especially since I wasn't dealing with homemade bias tape. Instead, I made every math error possible and wound up re-sizing the vinyl windows so I wouldn't have to cut new pieces of the novelty print. Vinyl from Walmart is cheaper and more expendable than pretty stuff from the quilt shop.

Zippered Vinyl Project Bag

I do like the bag I wound up with. It's a nice way to enjoy the pretty fabric without using up too much of it. And it lets me see what's inside.

Thursday, January 05, 2017

Turquoise Spools - A New Project Bag


Zip Top Project Bag - Vintage Spools

When I pulled this hunk of fabric out of the scrap bag, it screamed at me. And it was right. These spools are way too cute to be anything but a new project bag. They'd get lost in a scrap quilt. Even though it's my favorite thing to do with fabric, sometimes cutting prints up into unrecognizable itty-bitty pieces isn't the best answer.

There's no measuring with a project like this one, just ironing the fabric and laying it out to see what the largest two rectangles I could cut will look like and if they have bag-ish proportions. There wasn't much left over when I was done, but I won't let those narrow strings go to waste.

I'd assumed that the lining was going to be solid black or brown, then I saw a scrap of cotton left over from one of Teenage Daughter's dress making adventures. She's been warned that any fabric left in my sewing area is fair game. (I'm also fairly sure that she was done with it.)

Zip Top Project Bag - Vintage Spools

What I need right now are some big bags suitable for lugging library books, but this was more fun at the time.

Thursday, December 08, 2016

Now My Pens Are Safely Hidden


I'd forgotten that non-Crayola felt tip pens were a thing. Now that Pinterest has reminded me, I'm absolutely in love. Those little white stars at the top of the cap make me happy and conjure up vague hazy memories of red pens in my dad's desk at work.

To keep my pens mine, I needed a little bag to keep them contained in my bigger bag. The fabric choice kept stopping me in my tracks. I've got all kinds of cute novelty prints, but they're all sewing themed and that didn't seem right for office supplies. I'd finally settled on the American Jane ruler print and has the pieces cut before it registered that these are not rulers...


I'd say "oops" if  this print wasn't an even better choice for a pen bag. Measure twice, cut once, and actually look at the fabric you're using!

Thursday, November 10, 2016

Yarn Swift Storage


I've been meaning to sew a zipper bag for my swift, especially because it spends much more time in storage than it does in use. It takes a few minutes to wind a hank of yarn into a ball and a couple of weeks to knit the project. And most of the yarn I buy isn't in hanks to begin with. 

This is one of those tools that proves the "if you haven't used it in several months you don't need it" rule wrong. I don't use mine often, but when I do it's worth having. I've also used the rear view mirror of my car, my own knees, and a kid's hands to wind yarn. The swift is much easier! 

If you're not a knitter, here's what it does when it's expanded -- 


The top spins as you wind the yarn into a ball, either with a ball winder (have one, never use it) or your hands. It makes the job much faster and helps to avoid a hopelessly tangled mess of yarn. Although I've managed that even with the swift.

The bag is as simple as it gets, with three seamed sides and a long zipper. I decided a long time ago that when I did this I didn't want to be sliding the collapsed swift into the end of a long tube. All of those little ends want to  get caught on everything -- that's why it needed a storage bag in the first place.

I didn't make a lining or box the corners or anything fancy, even though it makes me feel like I'm cheating. Lier over at Ikat Bag makes a pretty convincing argument against unlined bags. It's a good thing that I skipped the lining though, because I wound up adjusting the length and width three times before I was happy. Figuring out the proper size to make a bag for an oddly shaped thing isn't one of my strong points.

The fabric is one of the oddest things I've found in my scraps to date, yellow calico spinning wheels. Just why? I like it because it's old and quirky but I'm not sure what I'd ever want to use it for besides a swift bag which won't see the light of day very often. (The bits that were left over will get chopped up and sewn into a scrap quilt so I can point at them in years to come and talk about the calico spinning wheels. They should fit right in with all of the other random bits of novelty prints.)

This post is linked to Bag It and Crazy Mom Quilts.


Tuesday, October 04, 2016

Vinyl Zipper Bag


I've wanted to try sewing with clear vinyl for a long time now, but never took the plunge and bought any of it.  The more I look at zipper ideas on Pinterest, the more intriguing possibilities I stumble across.

I had enough advance notice before I lost my car last week to pick up a yard of the vinyl and decided to see if I could pull this project off without a teflon presser foot. It turns out that I could, since all of my sewing was through the fabric on the outside of the vinyl. The most fiddly part of the whole thing was making my own bias tape.

This is a mish-mash of a few different tutorials.  I'm not happy with all of  the little details, but I'll be giving it another try soon.

This post is linked to  Bag It over at Elm Street Quilts. 

Thursday, September 01, 2016

A Purse Fit for the Big Top


Four days before we were due to leave for Arizona I decided that I absolutely positively had to have a new bag for the trip. I like the purse I've been carrying  for the past couple of years, but I can't hike with it and I hate leaving it in the car and I won't go two weeks without some kind of purse.

On our last two trips, I carried my wallet and  camera in the Nancy Drew bag. It worked, but I don't like having my wallet in an open top bag. Even though I know it's not likely to fall out on its own (it's hard enough to dig from the bottom when I need it),  I still wished I had a zipper.

What I really needed was a lightweight bag, about the size of my red purse, with a strap long enough to wear across my chest. So I made one.

The first battle was to choose fabric. I knew I wasn't going to have time to include every detail I wanted or to learn new tricks, so the fabric I'd already chosen for my dream purse was out. I did some digging and some thinking and wound up using the one fabric I'd absolutely ruled out as a potential tote bag.

I measured the existing red purse and added a couple of inches on each side to make up for boxing the bottom (see -- I learn from my mistakes!) Then I made myself a zippered pouch and boxed the corners a bit. There are some elements I love and some that didn't turn out quite right (especially the way the zipper lays) but overall it's not bad for a couple of hours of work.

After living with it for two weeks, I'm absolutely in love with this circus print. It got soaked completely through at Montezuma's Castle and covered with cinders on the Durango and Silverton Narrow Gauge Railroad and still did everything I needed it to do. The strap is wide enough not to dig into my shoulder too much, even after a couple of extra water bottles put an end to my "keep it as light as possible" strategy. I can tie a knot to shorten it for hanging on a chair back.

Not bad for a spur of the moment project that I made up on the fly!

This post is linked to  Crazy Mom Quilts, Busy Hands Quilts 

Thursday, August 11, 2016

Dragonfly Pouch

Do you autopsy projects that didn't turn out quite right? I've been wanting to try the Fully Open Bucket Pouch since I started playing with zippers. The directions over at Ikat Bag call for a rounded bottom so I took my measurements from another site and followed Lier's directions for the zipper. 

I was confused. Very confused. It probably didn't help that my recycled zipper has metal teeth. 


My bag opens wide, which is good. But I should have added some batting or interfacing to give it more body.

It'll work for my socks-in-progress, but I wish I'd made it larger. I was too distracted by zipper logistics to remember how much length boxing the corners eats up.


Next step -- a lined bag that opens wide, has batting to give it some structure, and doesn't have boxed corners! Or maybe has less boxed corners. I'm not sure yet.

Monday, February 15, 2016

Flat Zippered Pouch


I'm falling farther and farther behind on this zippered bag project. LiEr just posted chapter fourteen and I'm still back on number six, the flat zippered pouch. This is the one that she says everyone has made a hundred times. Not me. I was too busy avoiding zippers to be sucked in by zippered pouch tutorials. Because they contained those dreaded zippers....

Which I don't dread nearly as much since I've started following along with LiEr. I can do the zipper now. It's the coming up with measurements and templates that has me stumped. Drafting quilts is easy, but three dimensional objects still intimidate me. I'll get over that, though. I really want the Zippered Gusset Utility Case and Collapsible Drum, even if it means tackling some geometry and shopping for supplies.


This fabric wasn't directional and the piece I had to work with wasn't great for fussy cutting but I did what I could with what I had. For a thrift store scrap and an estate sale zipper, I don't think it came out half bad.

This post is linked to Share It, Crazy Mom Quilts,  Too  Cute Tuesday, Handmade Tuesdays

Tuesday, January 19, 2016

A Quiet Day at Home

Sometimes it feels like I'm the only one I know who is content to just hole up at home for a few days at a time. But my idea of heaven is knowing that I can stay put unless I want to go somewhere. Which is different from being truly stranded.  

We're back to sharing two cars between three drivers. That's a big improvement over a couple of weeks ago, when it was one car between the three of us.  If I really wanted or needed the van for something, I could work it out, but this week I had enough advance warning to get my ducks in a row and the boys and I are enjoying ourselves here. 

My day yesterday was filled with knitting and embroidery and some sewing and a fancy breakfast (and dishes and laundry and math and reading...)

I finished another little bag based on the Zip A Bag tutorial series, the darted pouch. This is the first time I've gotten my zipper stops sewn together the way they should be. (We were supposed to make this bag without them, but I was using a recycled zipper that I had to cut down to size and I knew how to make it work if I used the stops.) 


My pouch is floppy. At first I thought that I'd messed up the darts, or gotten the dimensions of the exterior and the lining different, but that's not the problem. The corduroy and quilting cotton I used for the lining just don't have enough body for my bag to hold its shape.  I can see how to fix it next time around, but I'm not expecting to work with corduroy again. This was my last piece.

LinkWithin

Related Posts with Thumbnails