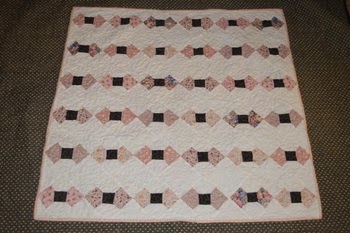
I designed this baby quilt to use the new AccuQuilt Bowties die (or you could use the 2 1/2" and 1 1/2" strip cutters....or cut 2 1/2" and 1 1/2" squares with a ruler and rotary cutter. Isn't it wonderful how flexible quilting can be?) You can find my tips for cutting with the Bowties die in this post.
To make each little butterfly, layer a 1 1/2" black square on a 2 1/2" print or background square and sew from corner to corner. Trim 1/4" from the stitching line as shown. (When I'm making traditional bow tie blocks, I leave the extra fabric in the seam, but leaving them in this case means that you'd be sewing through eight layers of fabric where the triangles meet. I tried -- it doesn't work!)
Make two print and two background squares for each butterfly and assemble as shown.
I made thirty-six butterfly blocks and set them on point in six rows of six. You'll need twenty-five plain 4 1/2" background squares. For the setting triangles, cut five 7" squares and cut twice on the diagonal to make four triangles. For the corners, cut two 3 3/4" triangles and cut each along the diagonal to make two triangles. If you need more explanation, check out this lesson from McCall's Quilting.
As always, if you make this quilt I'd love for you to send me a picture or link up to my weekly Let's Make Baby Quilts! linky party. There's a list of my free baby quilt tutorials over in the sidebar and you can find out when new ones are added by either following my blog or liking the Let's Make Baby Quilts Facebook page.


2 comments:
wow! this takes some talent for sure! looks great! - katie
This is gorgeous! I've recently retired and hope to get back to quilting. I'm your newest follower!
Post a Comment